
If you’ve decided to pursue a career as an electronics engineer, understanding how electronic circuits function both in theory and practice is essential. While theoretical knowledge can be gained from books and online resources, practical skills require hands-on experience. Whether you aim for a career in software/IT or core electronics, mastering the practical aspects of electronics is a must for any electronics engineer.
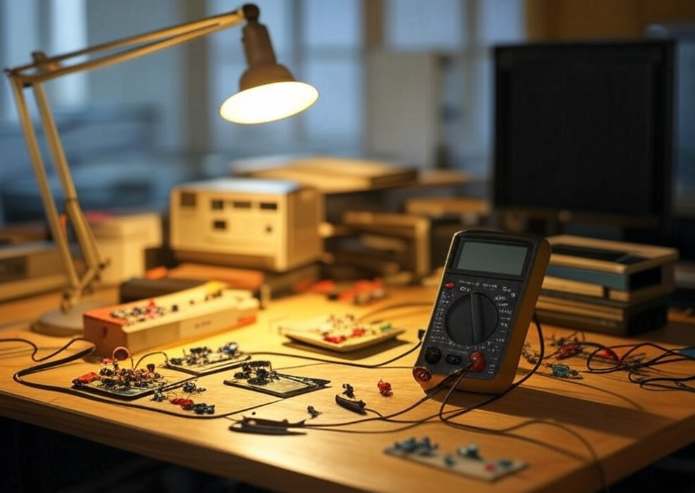
Electronics engineers work with circuits and components to design and build electronic systems. If you land a job at an electronics design company, your workplace will likely provide the necessary tools and components. However, students often rely on college lab facilities to test circuits. For those who have graduated and are job hunting or students without constant access to a college lab setting up a personal mini desktop lab can be invaluable. To do this, you’ll need a dedicated space at home with good ventilation, a desk or table, and a nearby power outlet.
Thanks to modern technology, a powerful laptop, notebook, or desktop computer allows you to simulate many electronic circuit functions and designs virtually, reducing the need for expensive hardware. Still, the hands-on experience of working with physical components offers unique and essential benefits that virtual simulations can’t fully replicate.
For beginners, setting up a lab with minimal investment and limited knowledge of tools and suppliers can be challenging. This article outlines the basic systems, test gear, electronic components, and software needed to get started as a budding electronics engineer.
Essential Tools and Systems
Electronics engineers primarily deal with electrical circuits, requiring basic testing and measuring instruments. Here’s what you’ll need:
- Multimeter
The most indispensable tool for any electronics engineer is a multimeter. It measures voltage, current, and resistance, with modern versions also offering capacitance, temperature, frequency, and more. - Soldering Iron
The second critical tool is a soldering iron, used to connect and solder components into circuits. It’s useless without solder and flux, which must accompany it. - DC Power Supply
A DC power supply is the third essential system, providing power to your circuits. - Components and Boards
To build circuits, you’ll need a basic set of components, including resistors, capacitors, inductors, discrete semiconductor devices, integrated circuits, sensors, boards, power supply modules, wires, LEDs, display panels, switches, connectors, and quartz crystal oscillators. Each circuit demands a specific set of components, so you don’t need to stock everything at once, just purchase what’s required for your project. However, keeping a sizable stock of through-hole resistors, capacitors, and diodes is wise, as swapping these for different values can fine-tune a circuit’s performance.
You’ll also need:
A general-purpose printed circuit board (PCB) and a breadboard to wire components into circuits. - A pair of connectors and connecting leads/wires for breadboard connections.
Additional Equipment (If Budget Allows)
Cathode Ray Oscilloscope (CRO): This expensive test gear is a game-changer for analyzing signals. A decent CRO costs around ₹40,000, depending on your budget.
Signal Generator: Useful for generating frequencies, though its cost varies based on the required range.

Software Tools: Many are free to download and use, but paid tools often offer superior features worth the investment.
Mechanical Tools: Don’t overlook essentials like tweezers, wire trimmers, nose pliers, cutting pliers, a set of screwdrivers, a magnifier, and a desoldering gun.
Sourcing and Expanding Your Lab
In future sections of this growing article, we’ll dive deeper into each of the above listed test-gear, equipment, tools and component, including where and how to buy them. We’ll also explore the latest gadgets like conductive pens for drawing circuit lines and expand the scope to setting up a more professional lab for commercial purposes.
For now, a multimeter, soldering iron, DC power supply, and a modest stock of components will set you on the path to gaining practical experience and exposure to electronic system design—whether you’re a student, a job seeker, or an aspiring professional.
Multimeter: Today digital multimeters available in the various price range starting from few hundred Rupees to thousands of Rupees. depending on your budget you can buy a simple Chain made multimeter or a multimeter from a good brand like fluke. The only issue with the low end multimeter is It may not last longer, And it may not withstand falls or any such physical shocks and also the accuracy is not perfect for a professional use, but it serves the purpose for your initial lab setup.
Typically multimeter helps you to measure voltage, current, resistance. However today's multimeter comes with additional measurements such as capacitance, temperature frequency and more.
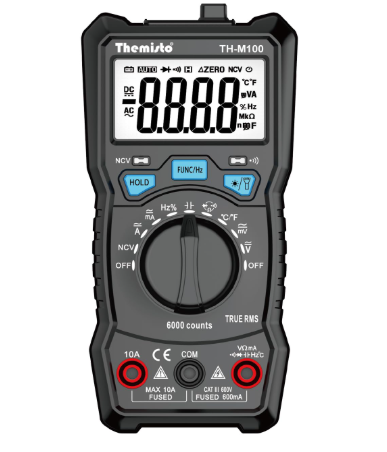
The basic multimeter you can buy from the popular Amazon. Here is a decent auto-range multimeter available for Rupees 1200/- from a company called Thermisto. Be aware this is not top brand from professional test-gear maker but decent enough for a budget constrained buyer.
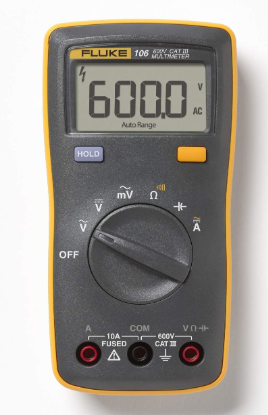
If you have deep packets check out Fluke 106 Palm-sized Digital Multimeter which is prices around Rupees 6000/-. This will comparatively last longer than the Thermisto and more reliable.
Here is the link
Become a paid subscriber to read the 10 page full article on setting up the lab. Onnce a subscriber you can read plenty of articles directly influencing on your career growth.
In this article if you anything missing or confusing please write to support@eeherald.com